


Reliance Jio introduced a new Emergency Data Loan which provides ‘Recharge Now and Pay Later’ functionality to users who run out of their high-speed data quota and are unable to recharge immediately. Under this offer, Jio is allowing prepaid users to borrow up to 5 Emergency Data packs of 1GB each (Valued at ₹11 / pack).
How to Claim Jio Emergency Data Loan

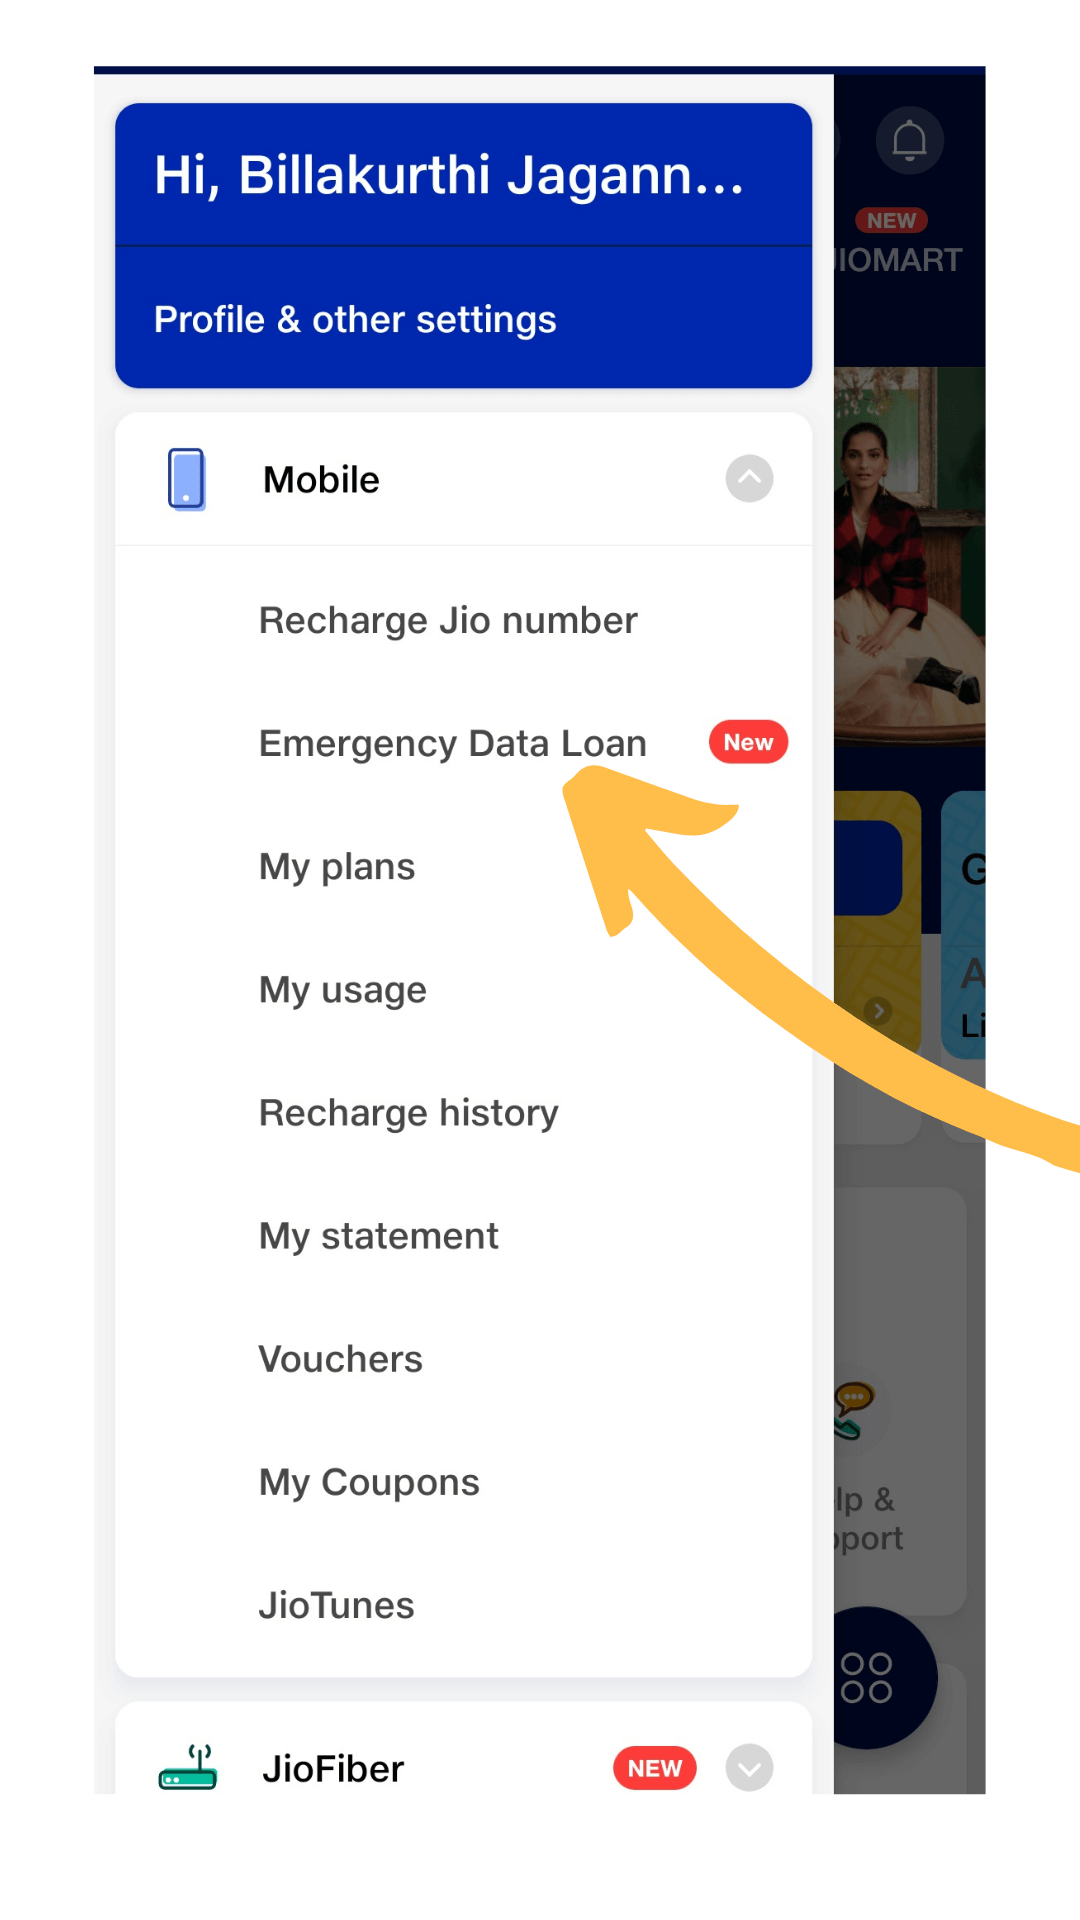
- Open MyJio App or Download it from Play Store
- Select / Login with your Jio Number on which emergency data loan is required
- Click on the menu on the home screen
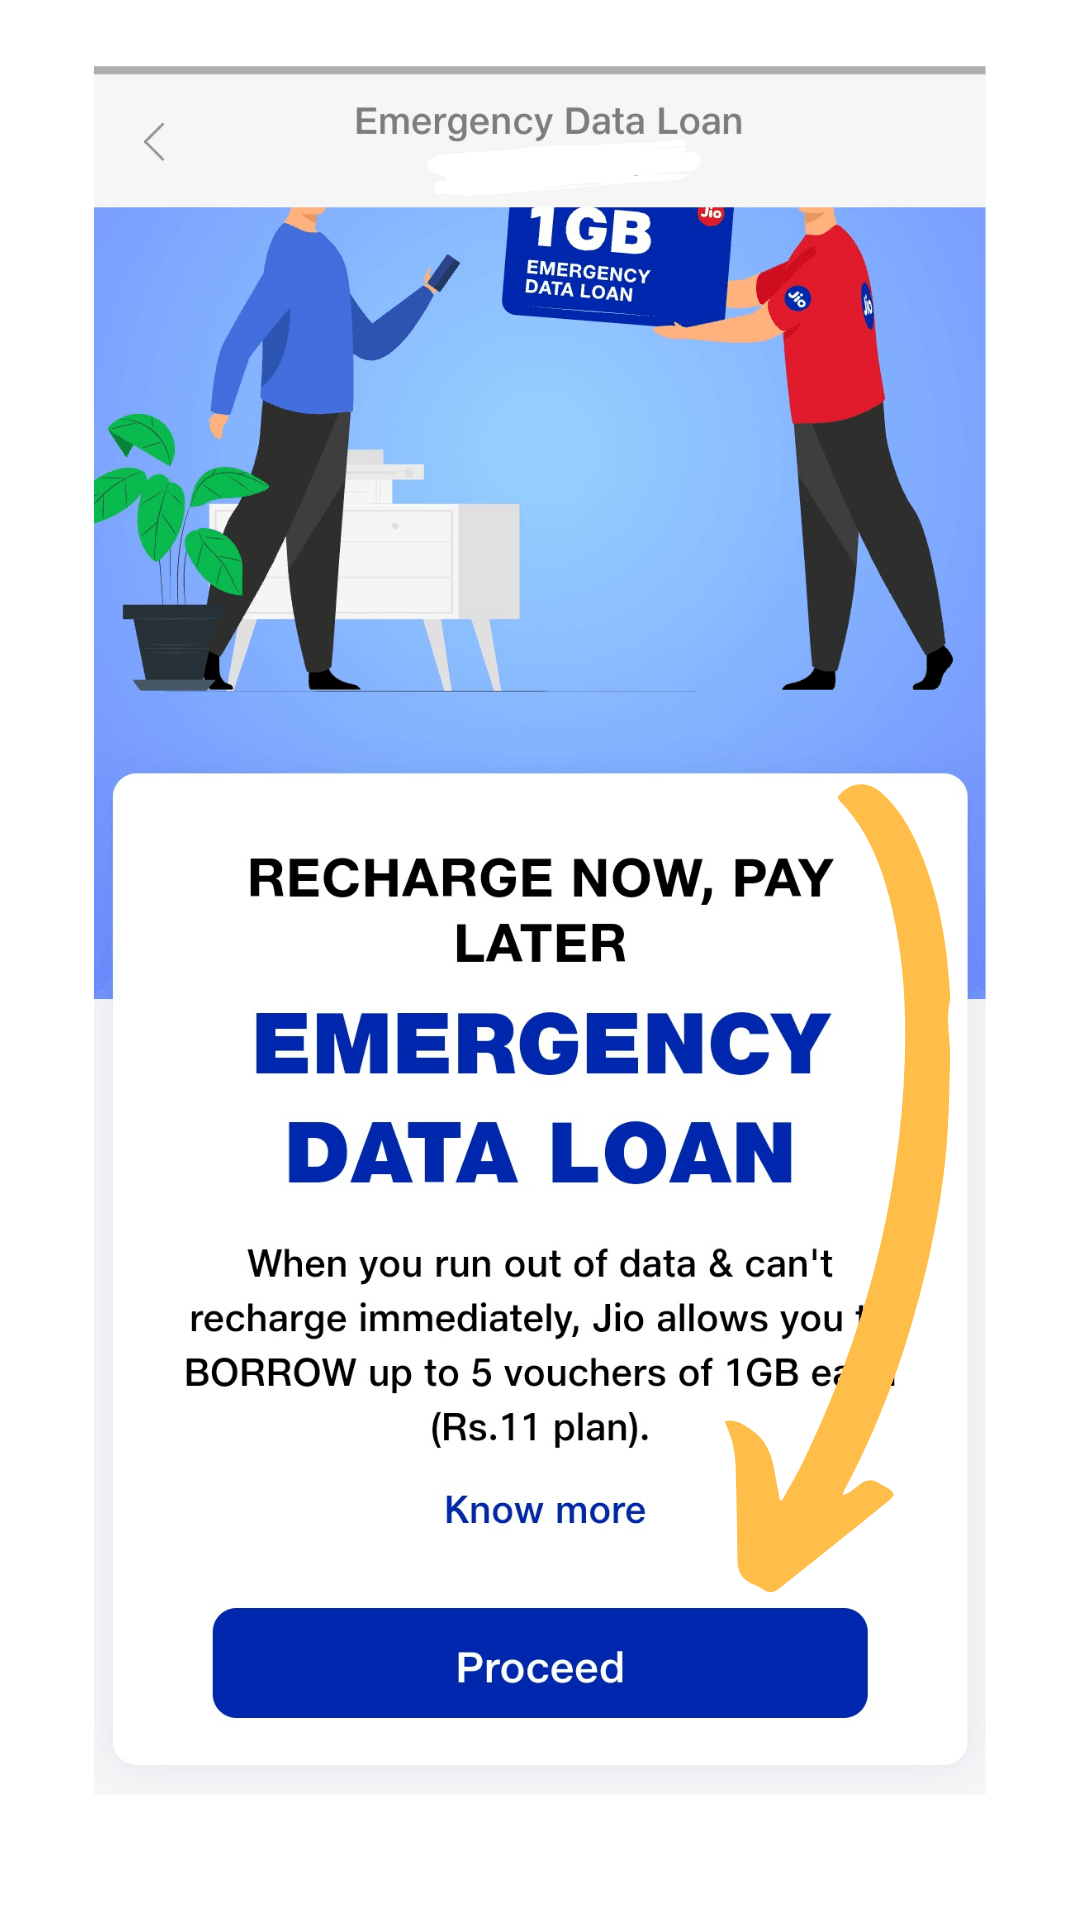
- Select Emergency data loan and ‘Proceed’
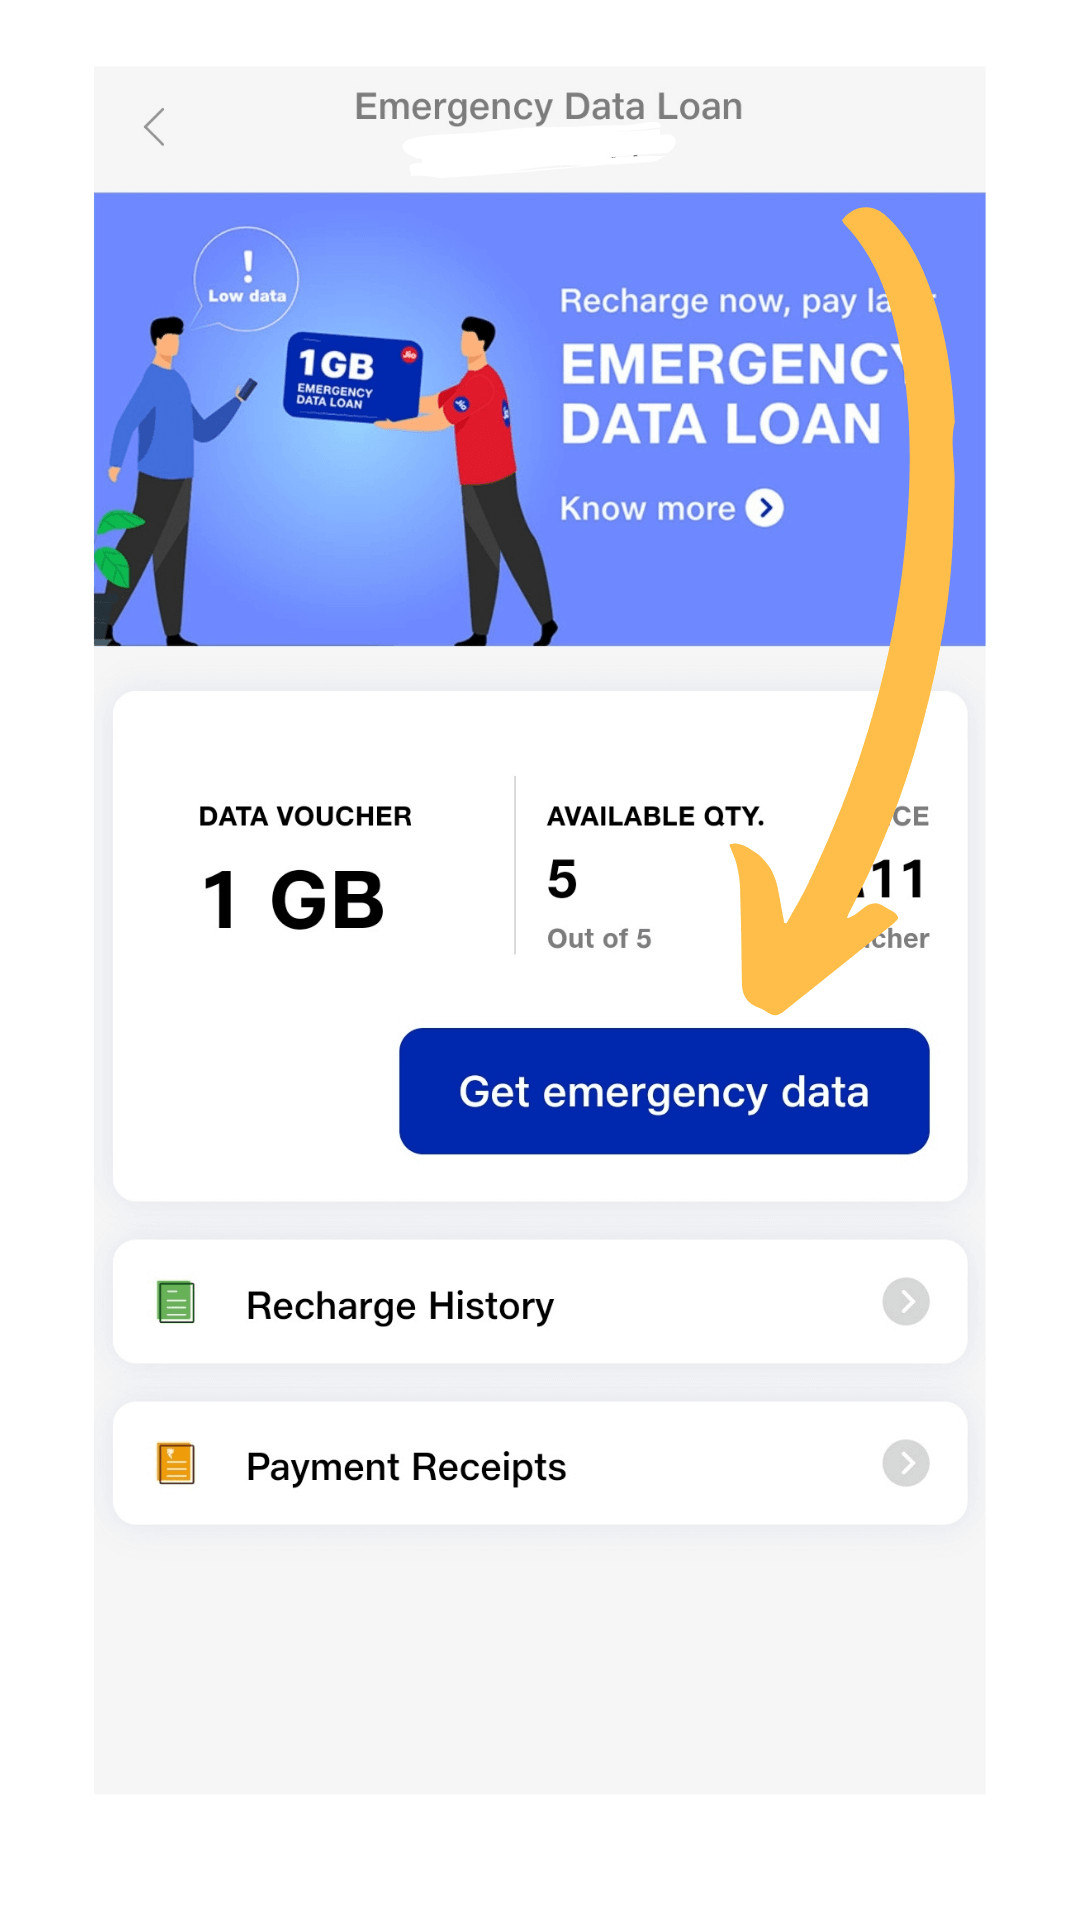
- Process “Get emergency data” option
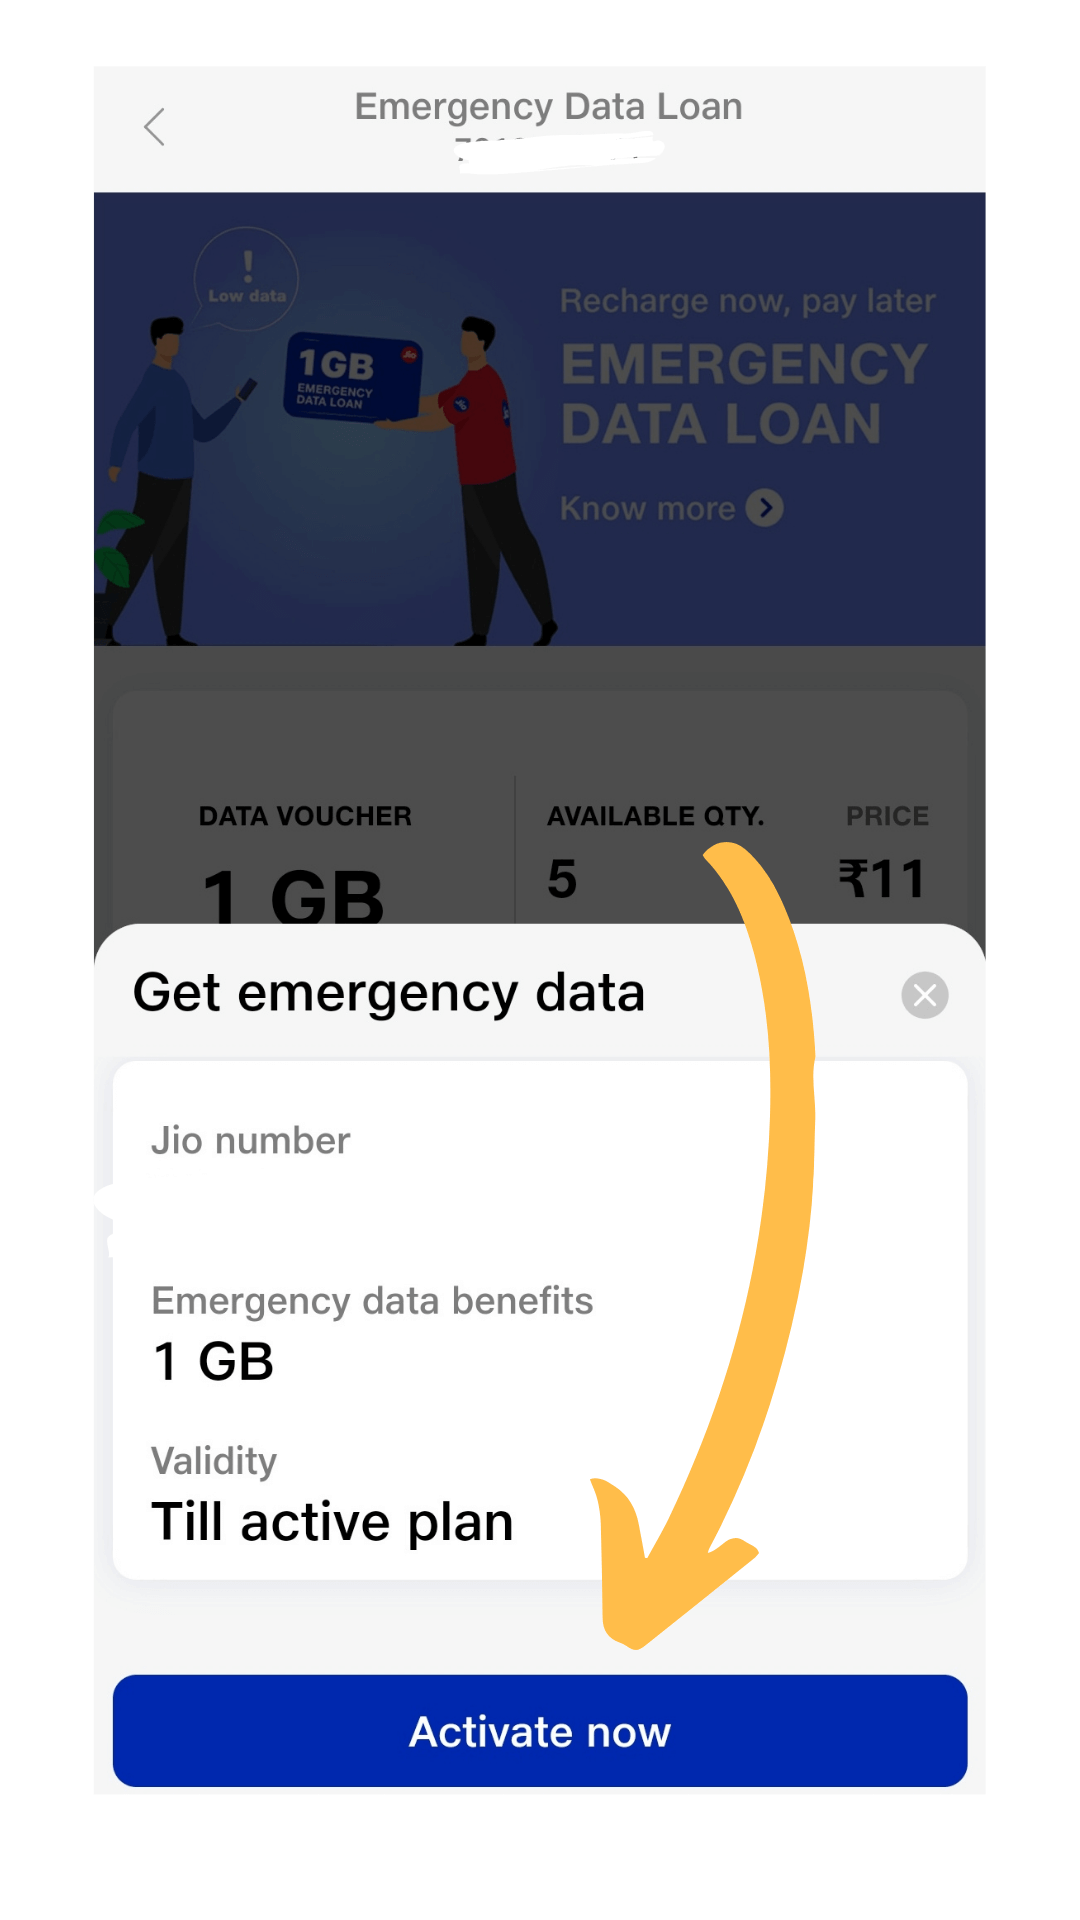
- Get 1GB high-speed data -click-on ‘Proceed’.
- Rate your experience.
- Press the ‘Submit’ or ‘Later’ option
Currently, this facility is available to Jio prepaid and also it doesn’t work if you don’t have the main plan. The company also confirms There will be no extra charge while availing of the Emergency Data Loan Offer. For example, if you bought 1 data pack, then you need to pay ₹11 and if you took 5 packs, then you need to pay ₹55 (₹11*5) for your data loan.
Process of payment for Jio Emergency Data Loan amount?
If you are ready to pay money to the data loan you too you can follow the simple steps listed below. Once you have paid the money back you can again allowed to borrow another 5 1 GB data vouchers.
- Login in MyJio App.
- Login with your Jio Number
- Select Recharge option
- Go to 4G Data Voucher Tab
- Payment option with Recharge ₹11 each (1GB high-speed data) -click-on Payment of Emergency data loan.
- Total loan amount reflected for payment.
- Select any online payment option to process.
- Payment confirmation.
- Jio Emergency Data Loan offer counter auto resets
- You can reuse your data loan offer quota
So, this is how you can avail Jio Data loan and pay the money back when you have. This is really a good option for users like me. Hope this tutorial helped you.