


Taking screenshots on the browser is a little bit hassle compared to a traditional screenshot that can be done simply by using the pressing a button and tapping an icon.
In this guide, we are going to look at how to take screenshots on Google Chrome with simple steps. We are going to look at two different methods, one is using chrome inbuilt developer tools and the other one is using an extension that makes it simple for you.
How to take a screenshot on a Google Chrome browser
1. Using chrome developer tools
Google Chrome developer tools have an inbuilt screenshot function that can be used to take four kinds of screenshots listed below.
- Take a screenshot of the area. This feature enables you to capture a portion of the screen and save it as a screenshot. After a brief moment, you’ll be able to drag a box anywhere within the Chrome window. Select the section of the page you wish to save and click Save. Take note that you cannot use this tool to capture the Element Inspector itself — that is, the Element Inspector itself is not included in the screenshot.
- Take a screenshot in its entirety. This option saves a full-page image of the website, from top to bottom. It’s a convenient way to capture an image of a lengthy page that extends well beyond the screen’s bottom.
- Take a screenshot of the node. This is more of a developer-oriented feature; it allows you to capture an image of a single HTML element selected in the Element Inspector.
- Take a screenshot. This is the most accurate representation of a standard screenshot. It takes a snapshot of what is currently visible on your screen and saves it.

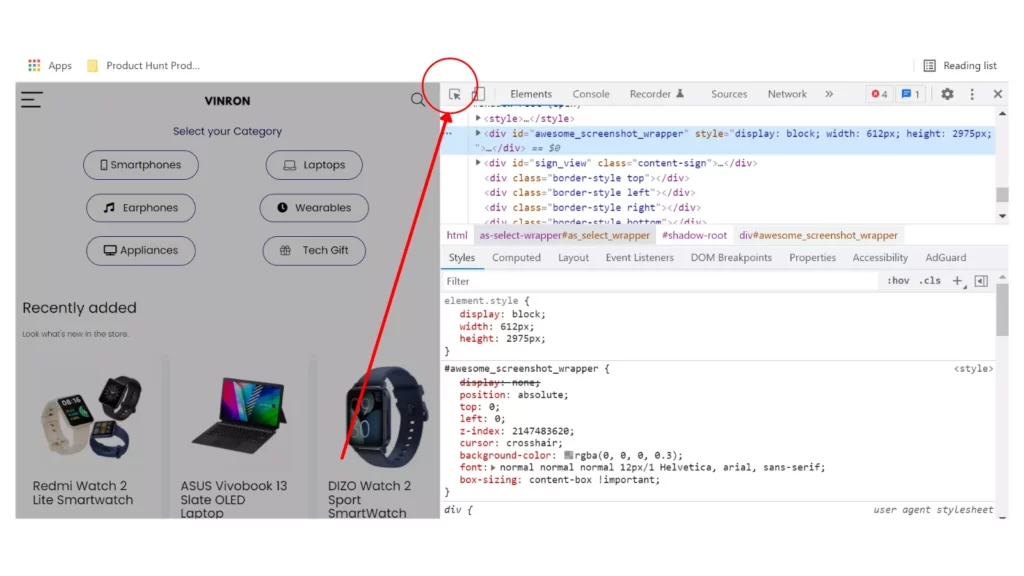
- Open Google Chrome and press Ctrl + Shift + I on a PC or Command + Option + I on a Mac. This will open a developer menu called the Element Inspector, which will allow you to view the HTML used to create the current web page. Now tap on element selector icon on the top.
- Following that, press Ctrl + Shift P on a PC or Command + Shift P on a Mac. This allows you to search for developer tools in your list. Now, in the search box, type screenshot. Now you can create various types of screenshots based on your requirements.
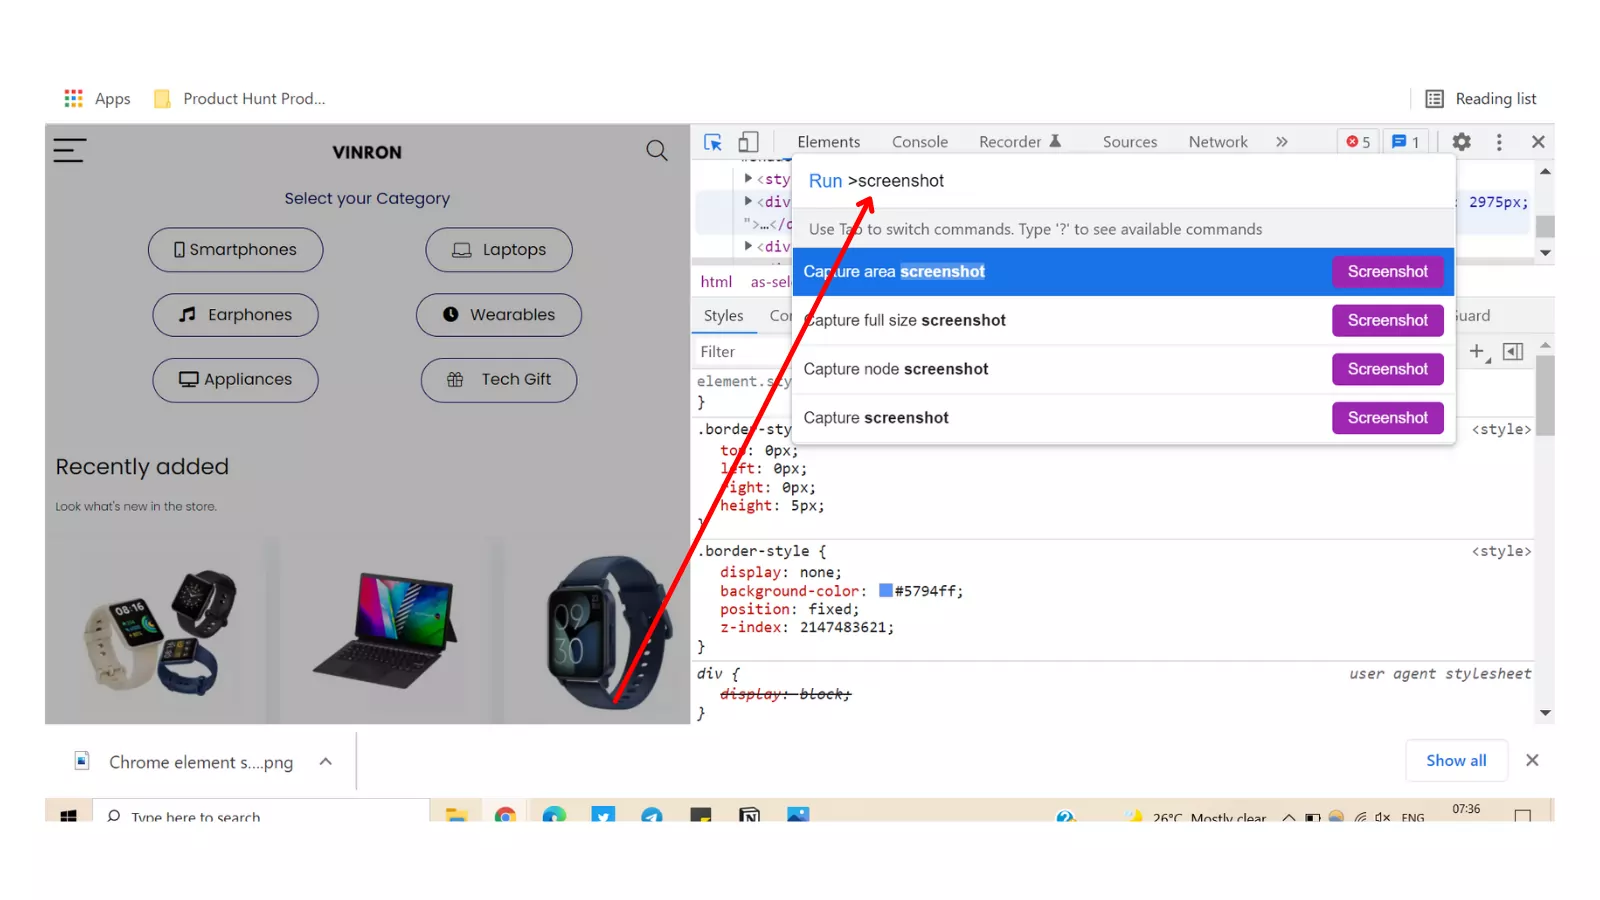
- Use the arrow keys on your keyboard to scroll down to the one you want and press Enter. Your screenshot will be automatically captured and saved. It is located at the bottom of the download manager window in Chrome.
2. Using Awesome screenshot extension
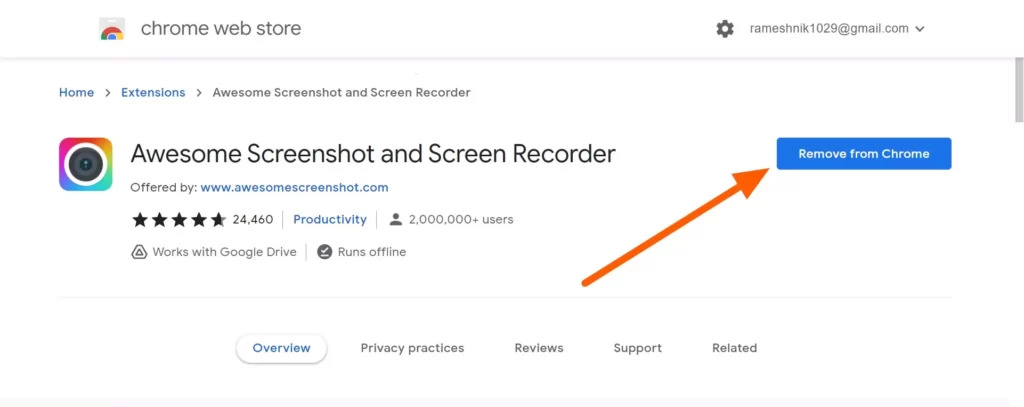
The awesome screenshot is really the best chrome extension that makes the work simple for you. If you want a hassle-free screenshot tool, look no further than the awesome screenshot chrome extension.
Install Awesome screenshot chrome extension by visiting Google Chrome Web Store or clicking this link directly.
Once you have added it, the extension will be visible on top of your extension list, if not click on the extension icon and pin the extension.
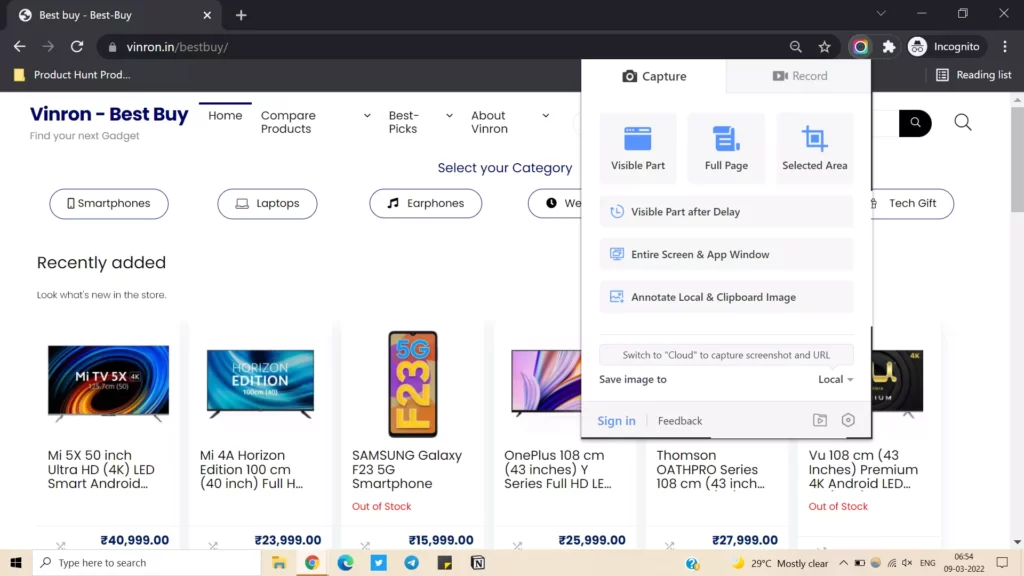
If you want to take a screenshot, you can simply tap on the extension, and select the type of extension you need.
So, this is how you can take screenshots on your browser. Hope you find this tutorial helpful. If you have any suggestions you can suggest us at vinron.in/suggestions. For more helpful Guides you can click the links below.